You'll probably hate that there are so many steps… but I promise it's worth it.
Please bare in mind that this guide is based on opinion & is preference biased. Time and care has been taken to make sure this guide is as accurate and factually correct as possible, but anyone can make mistakes.
— Echo
01Before you start
The Steam Deck is a computer. Plug it into a display, keyboard and mouse if you can, to make following this guide even easier.
This guide may look intimidating, but I promise it's super simpleish.
Prices listed in GBP — check your country's Steam Store for accurate pricing.
02Lossless Scaling
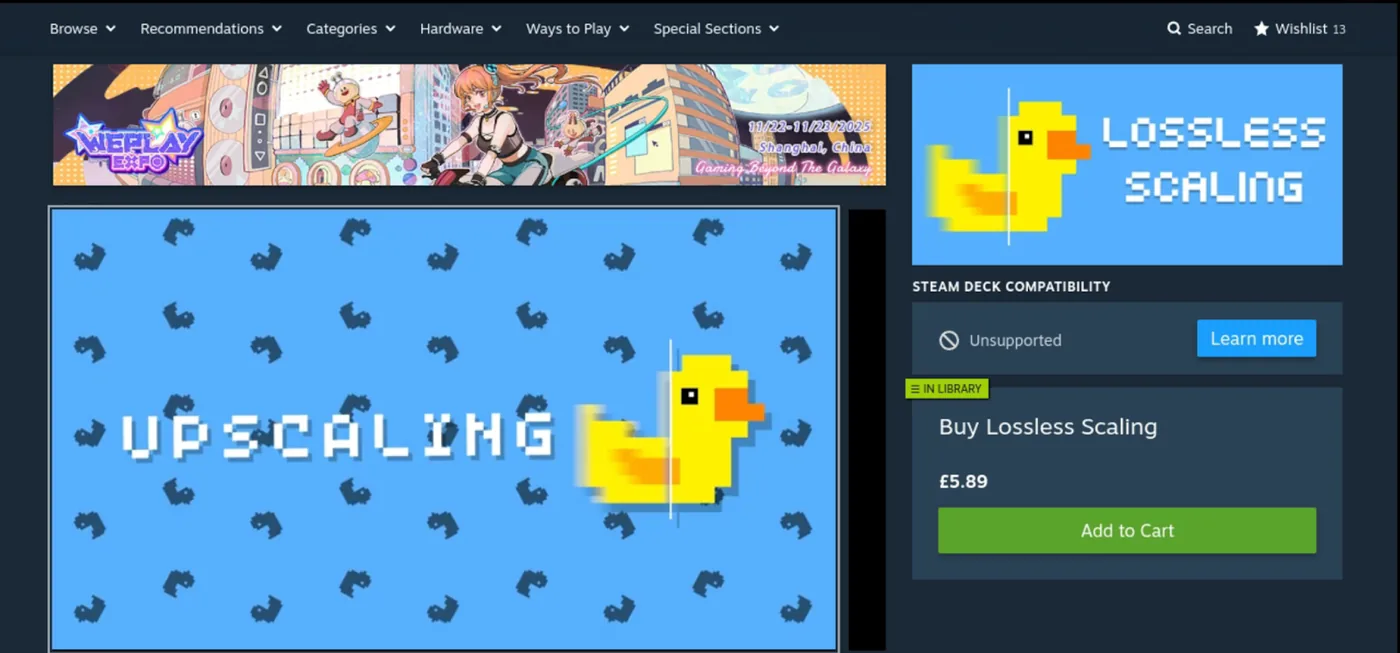
For the best experience you'll need to make an additional purchase. It's cheap…
Lossless Scaling — ~£5.89: store.steampowered.com/app/993090
While this isn't an application you'll "actually" have to use directly, there's a plugin that utilises it to make your Steam Deck play games stably that otherwise would suffer from low FPS. You'll need it downloaded on your Deck for later steps.
03Set an admin password
To do this go into "Desktop Mode" — either hold the power button then select Desktop Mode, or press the Steam Button and then select Power > Desktop Mode.
While in desktop mode you can use:
- Right trackpad — mouse control
- Left trackpad — mouse scroll (move your thumb in a circular motion, not up and down)
- Right trigger — left click
- Left trigger — right click
- Press X after selecting any text box and the keyboard should pop up
There should also be a button on the desktop that you can use to go back to Game Mode.
To set a password: go to the taskbar at the bottom, click the icon on the far left to open the application menu, and look for "Konsole". Once Konsole is open, type in:
passwd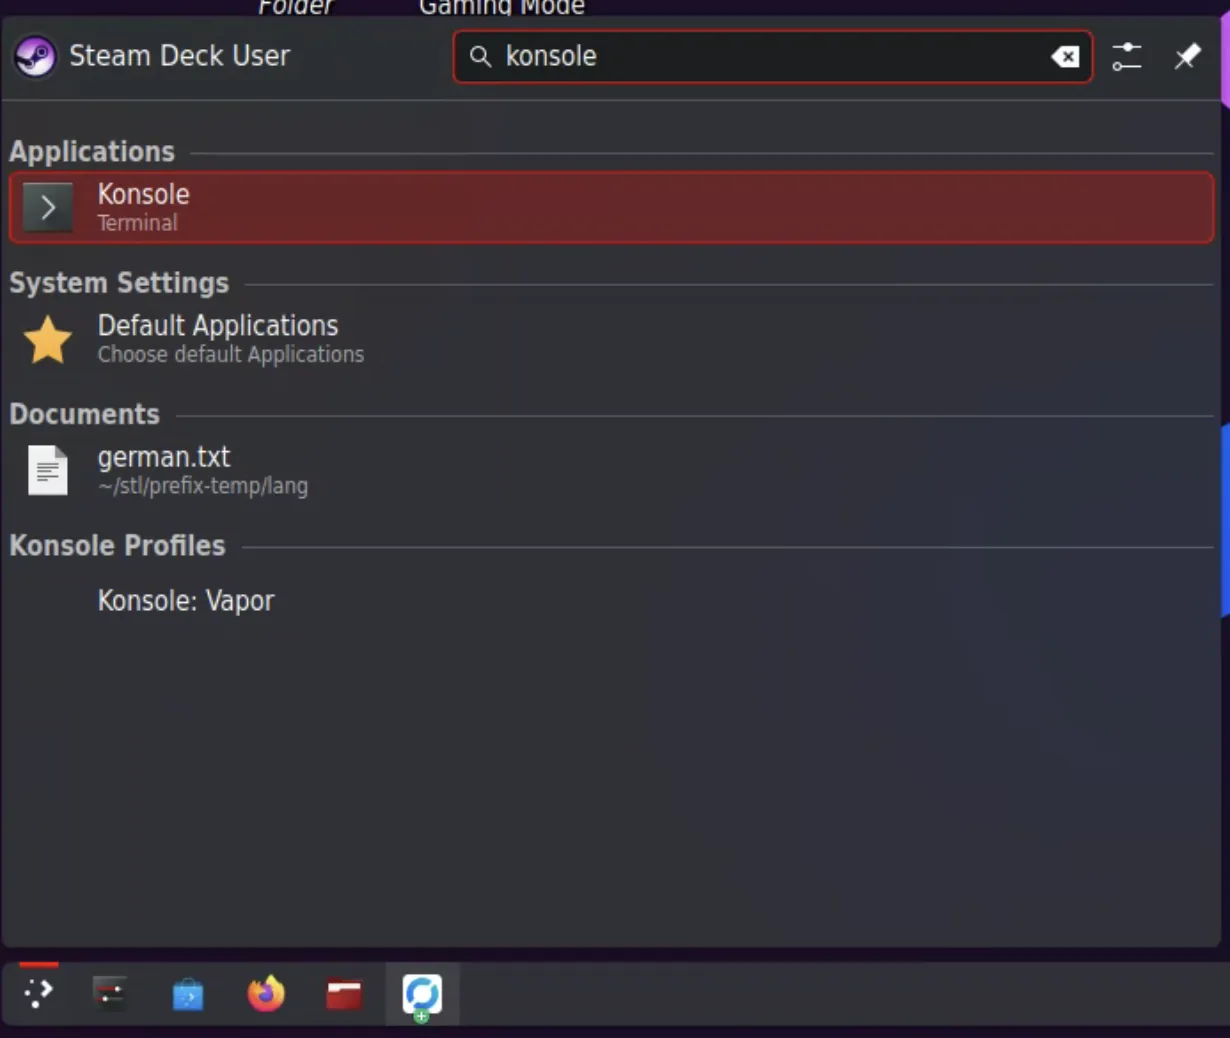
Enter a password (you'll be asked to enter it twice).
PICK SOMETHING SHORT AND SIMPLE! This goes against everything people tell you about passwords, but I doubt you want to be entering a 15 character password on a touchscreen — or connecting a keyboard and mouse every time you need to install something. Thank me later.
You will need to remember this password.
04Installing Decky Loader
- Click the following link to download the Decky Loader install script: decky.xyz/download
- This script will install a plugin loader (clue was in the title) for the Steam Deck in Game Mode.
- To open/execute the file you may need to rename it — sometimes the file saves as
decky_installer.desktop.download. If it's downloaded with the wrong name, change it todecky_installer.desktop. - Move the file to the desktop.
- Double click
decky_installer.desktopand you should be asked whether you want to execute the file. - Hit yes — a Konsole window should open and you'll be prompted to enter the password you just set.
- Pick the standard installation "Release" and wait a few seconds for it to install.
Plugins can sometimes break. When this happens the Steam Deck may present a crash screen with some details.
- It will usually also present a button to uninstall the plugin that caused the crash.
- Sometimes reinstalling the plugin that caused the crash will fix it; other times you'll have to uninstall the app permanently.
This "usually" only happens after major updates to SteamOS, but rest assured — it's pretty rare and easy to fix if you follow the guidance above.
05Installing CryoUtilities
This is absolutely GOATED. If nothing else, do this bit.
- Download the following link to your Steam Deck; right click the link and pick "Save-As":
InstallCryoUtilities.desktop - Move the downloaded file to your desktop. Make sure it's called
InstallCryoUtilities.desktop. - Open the file and follow the steps to install the app.
- Open CryoUtilities and, when prompted, enter your admin password.
- Pick the "Recommended" option and wait for it to complete its setup.
This will allocate 16GB of your SSD to "SWAP" — which allows the Steam Deck to use part of the SSD as temporary, slower RAM.
06VRAM: the BIOS tweak
THESE NEXT STEPS CAN BE A LITTLE COMPLEX.
To make sure your Steam Deck is giving your games the best chance of running well, we'll be altering the amount of VRAM your Steam Deck pre-allocates from the 16GB of unified RAM.
This will involve entering the BIOS and making one change. If you're not comfortable doing this then skip this part — but be aware that doing so could lead to suboptimal performance. Don't be a wuss.
A helpful video is linked below.
Please note: this is not my video and I take no credit for it. All credit goes to Deck Wizard & their channel. It's a great channel.
Step by step
- Shutdown your Steam Deck completely.
- Once it has shutdown, hold the Volume Up (+) button.
- While continuing to hold Volume Up, press the power button — just press and release, but continue to hold Vol Up.
- Keep holding Vol Up until you hear a beep and the Steam logo appears.
- While in the BIOS you can use the D-Pad to navigate and the (A) button to select. You can also use the trackpad and R2.
- From the four choices available on the BIOS screen, pick "Setup Utility".
- Within "Setup Utility", pick "Advanced" on the left.
- From the list of options pick "UMA Frame Buffer Size". It will be set to 1G by default.
- Change the UMA Frame Buffer Size from 1G to 4G.
- Press the Select button (top left beside the D-Pad) and save and exit the BIOS.
Sometimes after "major" SteamOS updates the Steam Deck's firmware/BIOS is also updated. When this happens the default settings will be reapplied by SteamOS, and you'll have to repeat these steps to make sure your optimisations remain.
07Downloading LSFG
Click this link and the latest version should download:
Just leave it in your downloads folder.
08Installing LSFG
- Go back to Game Mode via the shortcut on your desktop.
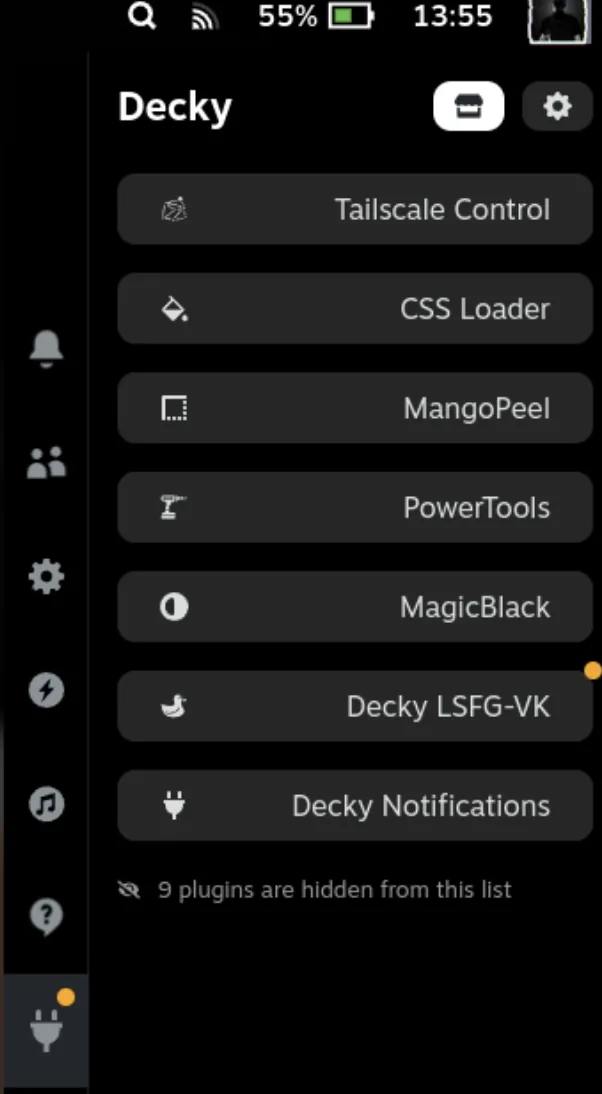
- Press the ellipsis button (three dots) to open the "Quick Access Menu".
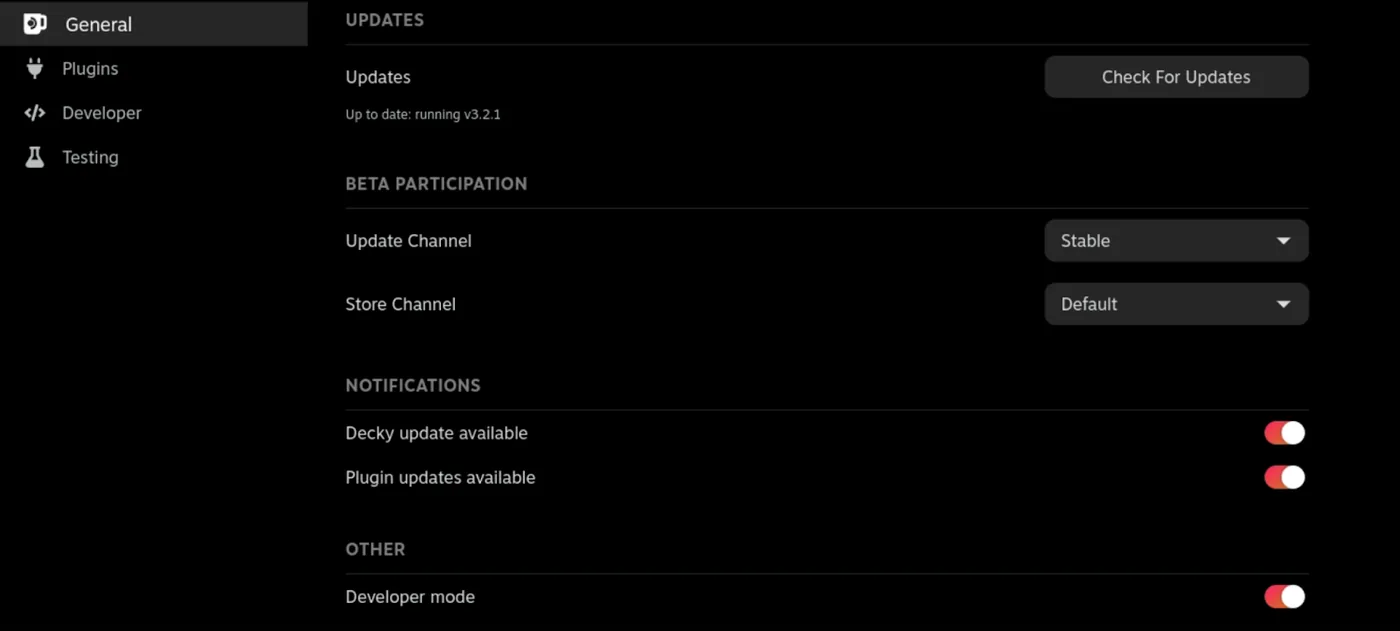
- At the bottom you should now see a plug symbol. Tap it to show the Decky Loader quick access menu, then tap the settings icon in the top right.
- Once Decky Loader is open, scroll down a little to enable "Developer Mode".
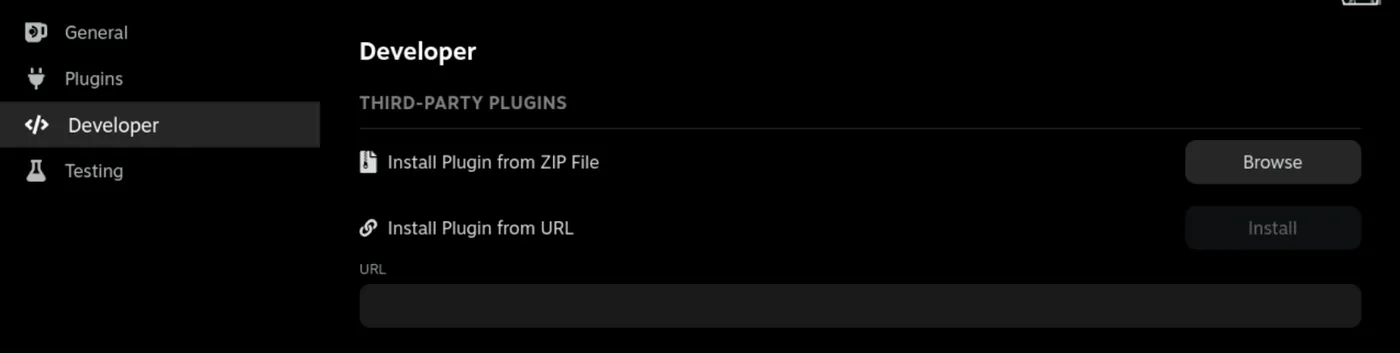
- On the left tap "Developer".
- Choose "Install Plugin From ZIP File".
- From the menu that opens, find your Downloads folder and pick the
decky-lsfg-vk.zip.
If you did not get the app in step one (Lossless Scaling from the Steam store), this is basically useless.
You'll now be able to use LSFG for frame generation and "sometimes" double your FPS in games that struggle to run on Steam Deck.
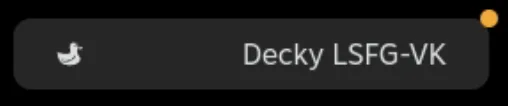
From the Decky Loader quick access menu you should be able to pick "Decky LSFG-VK" from the list of plugins to access the LSFG settings. The first time you access LSFG it should prompt you to install LSFG — hit install and then proceed. I'd recommend the following settings:
- FPS Multiplier: 2X
- Flow Scale: 80%–90%
- Present Mode: On
- Performance Mode: On
- HDR Mode: On.
- Leave everything else off.
Choosing your launch option
At the bottom of the page you'll find two buttons:
"Copy launch options" — this is the one we like.
"LSFG + DeckyFG" — this one is a bit fucky.
The standard and recommended choice is "Copy launch options", which will use the Lossless Scaling application from step one to generate frames and upscale the chosen game.
"LSFG + DeckyFG" uses an additional hack/mod to activate DLSS within games that would usually not allow it. DLSS is proprietary NVIDIA software, but in some cases it can work very well on Deck to improve gameplay. Only pick this option when you're really desperate — it is not recommended and will cause a lot of latency.
From the menu that opens, find your Downloads folder and pick the
decky-lsfg-vk.zip.
09How to use LSFG
Before we proceed I'd like to first say the following:
Just because LSFG is installed, that doesn't mean you should use it on every game you install.
LSFG — like many of the other "things" you've installed so far — is a tool. One that can and should be used to "optimise" your play experience, not become your default play experience.
I'd advise you to use LSFG when you notice that your framerate in games "could" be higher — e.g. triple-A titles that would otherwise be a slideshow.
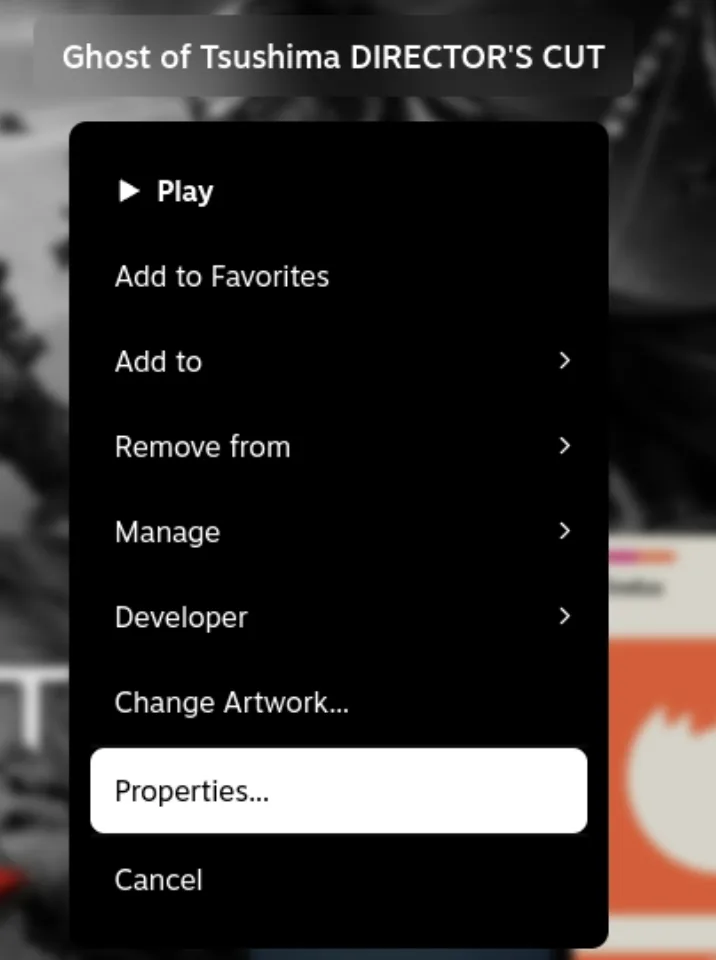
- Tap "Copy launch options" from the Decky LSFG-VK plugin.
- Go to a game that may benefit from additional frames.
- Open the game's settings menu — highlight the game and then press the 3-line button (top right beside the joystick).
- Select "Properties", then within General scroll down to "Launch Options" and tap the text field.
- On the keyboard you should be able to press the "Paste" button.
10Downloading additional Proton packages
Proton is a translation layer that enables Linux to execute Windows code. The included versions are "okay", but we can do better.
If you try to download apps from the Discover store and you get the error below, head to Accounting for weird Discover bugs for instructions that may resolve it.
Error pulling from repo: GPG verification enabled, but no
signatures found (use gpg-verify=false in remote config to disable)- Go to Desktop Mode.
- Open the application menu and look for an app called "Discover", which is essentially an app store.
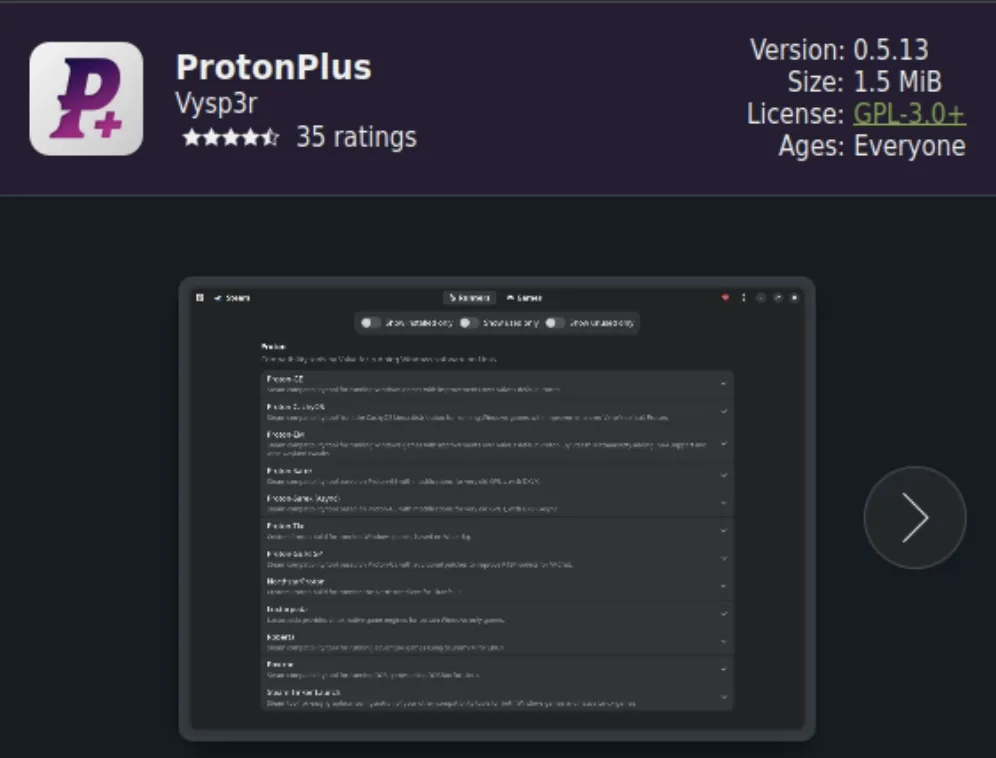
- Search for "ProtonPlus" and install it.
- Open Proton Plus from the start/application menu.
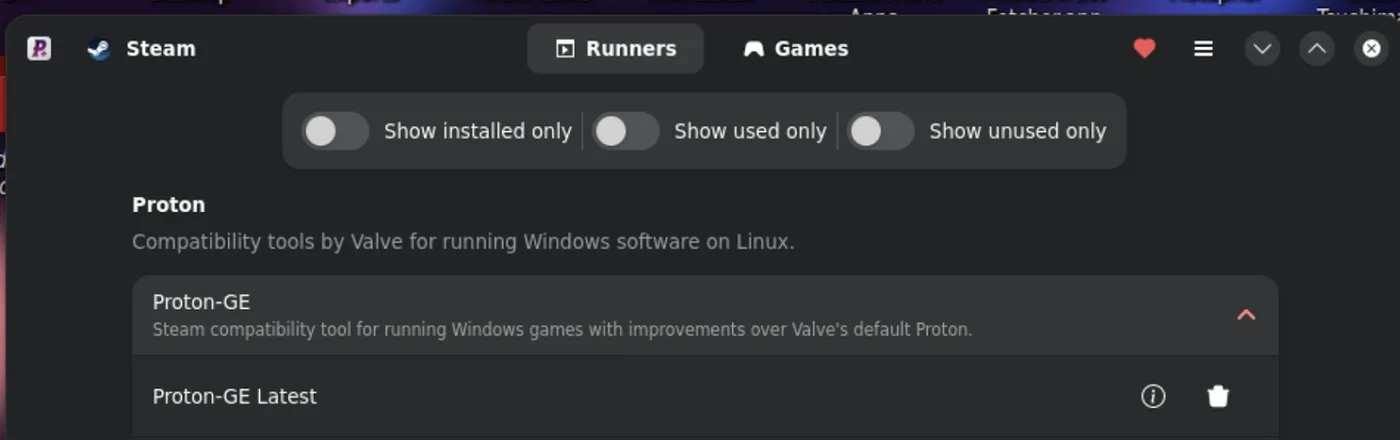
- You'll now see a list — pick "Proton-GE".
- Download "Proton-GE Latest".
- Go back to Game Mode.
Additionally there are some native Proton packages you'll want to make sure you download. These should be available by default, and to access them:
- Press the "Steam" button.
- Pick "Library".
- Then use the search to look for the following:
- Proton Easy Anti-Cheat Runtime
- Proton Experimental (this one is a must-have)
- Proton BattlEye Runtime
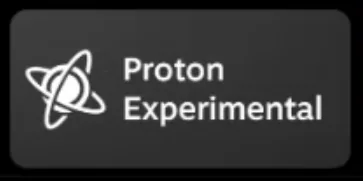
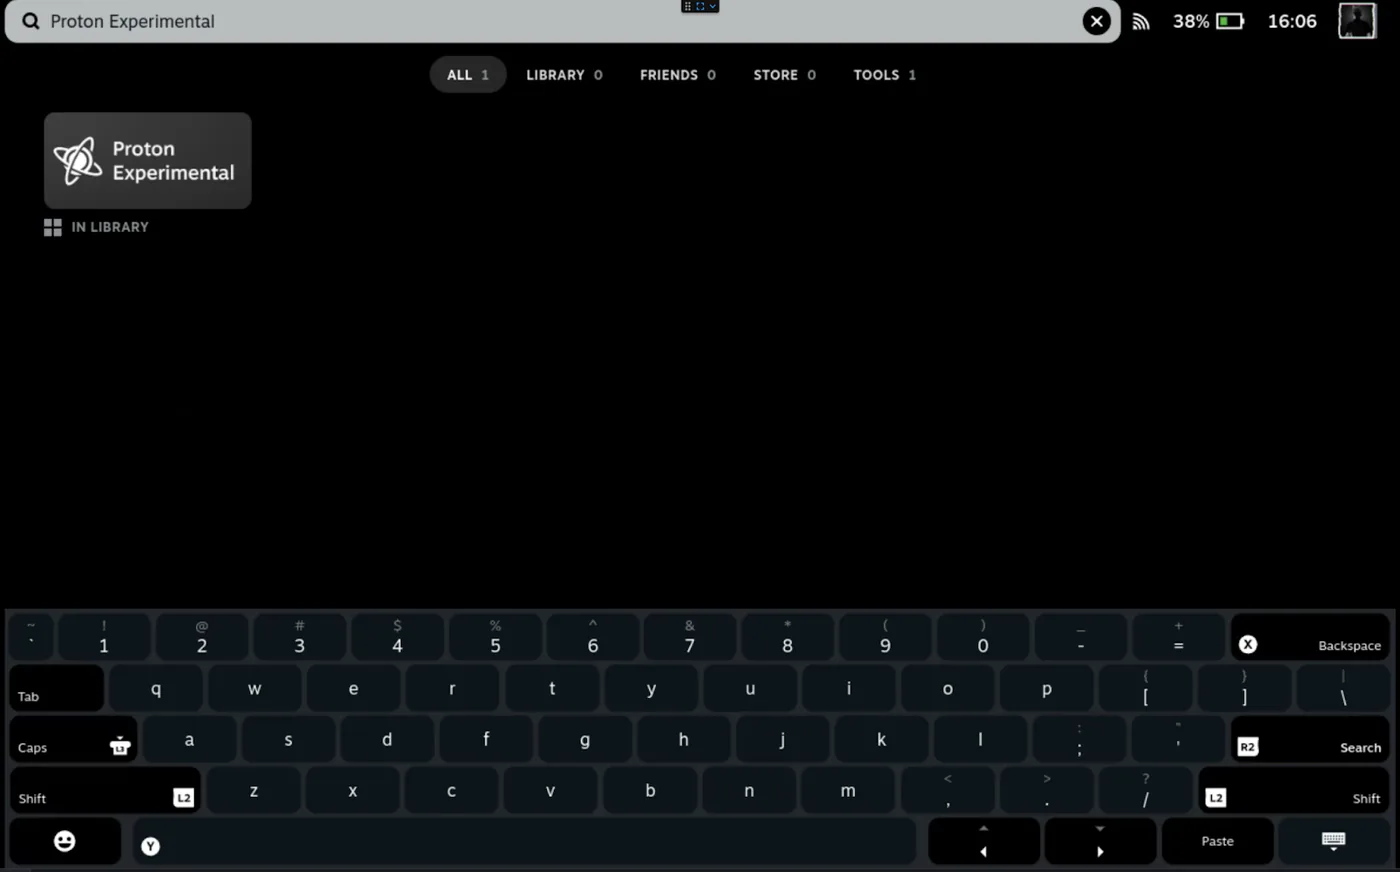
These "runtimes" are useful to have, as there are occasions where "Proton-GE" or even the native Proton packages are unable to run games. This can be due to anti-cheat restrictions or sometimes a rare dependency a game might have.
Proton Experimental in particular should be a default second option to test if you're having trouble getting a game to run.
11Using Proton
If the game you want to play does not have a "native" Linux version, your Steam Deck will automatically use Proton to execute and play the game.
To make sure it's using the best version, we'll set it to use "Proton-GE" before it uses the default version.
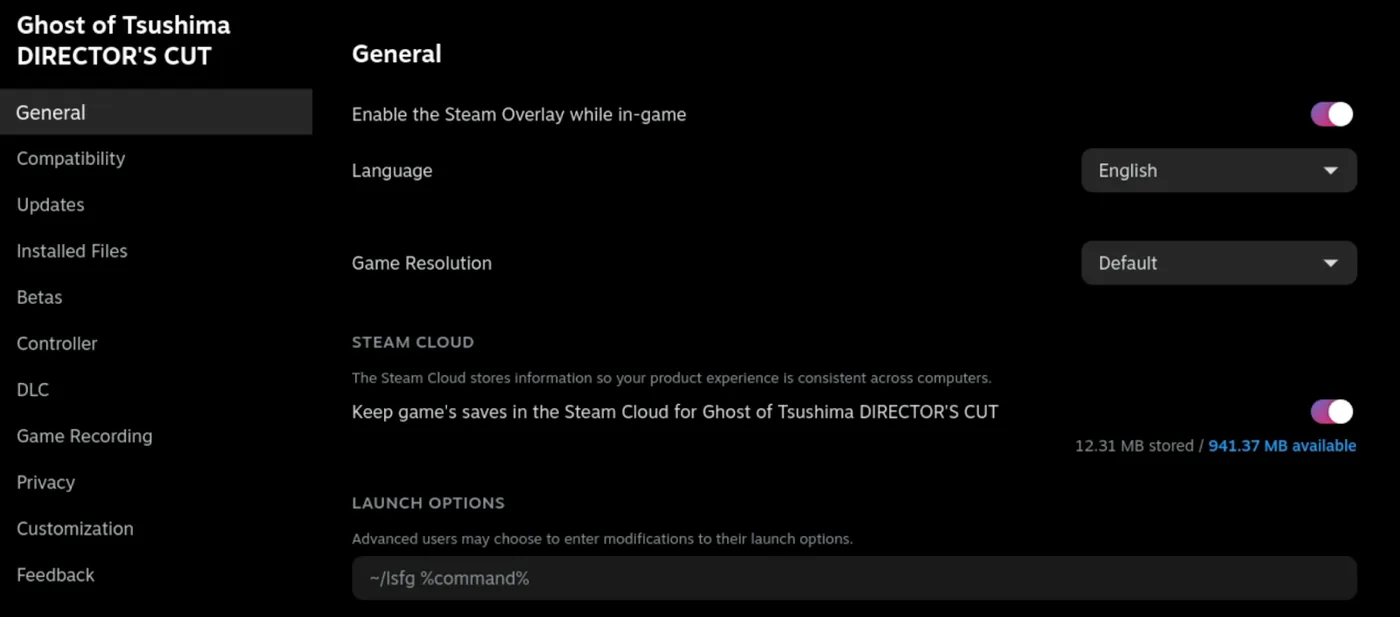
- On the game you want to play, press the "three line" button to open the menu and select "Properties".
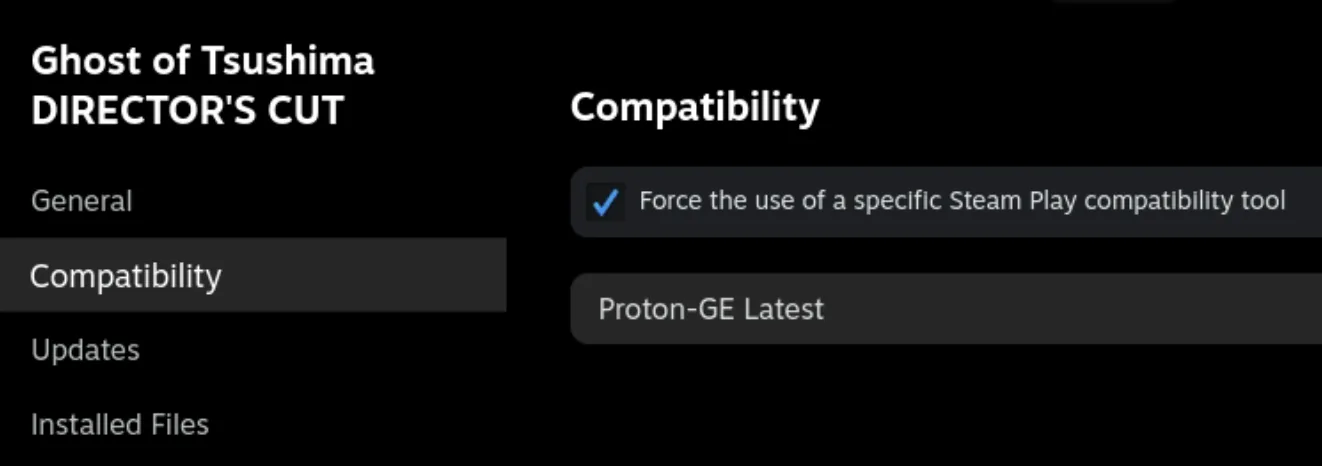
- On the left, select "Compatibility".
- Tick the box that says "Force the use of a specific Steam Play compatibility tool".
- From the list pick "Proton-GE Latest".
12Optional: setting Proton-GE "globally"
To set Proton-GE as your global default — applied to all games without having to manually set it — you'll need to turn on developer mode on your Steam Deck:
- Press the "Steam" button.
- Pick "Settings".
- Scroll to the bottom, press "Enable Developer Mode".
- Once developer mode is on, within Settings scroll to the bottom of the settings list.
- Within the developer menu, scroll down until you see a section called "Steam Play".
- Change "Default compatibility tool" to "Proton-GE Latest".
Your Steam Deck may need to reboot after enabling developer mode, and your Steam client will need to restart after changing the default tool.
13Accounting for weird Discover bugs
While this shouldn't be needed, I have seen people encounter a strange Discover bug:
"Error pulling from repo: GPG verification enabled, but no signatures
found (use gpg-verify=false in remote config to disable)"
To fix it, try the following commands one by one in Konsole. You may get an error on the third command — ignore it and proceed to the fourth.
flatpak remote-delete --system --force flathub
flatpak remote-add --system flathub https://flathub.org/repo/flathub.flatpakrepo
flatpak remote-delete --user --force flathub
flatpak remote-add --user flathub https://flathub.org/repo/flathub.flatpakrepo14Additional resources
This section includes some helpful links to Steam Deck related content, and is intended to provide direction to useful and informative material.
-
GamingOnLinux
A good source for Linux gaming news that isn't isolated to the Steam Deck, though the Deck is heavily featured. -
Steam Deck Gaming
A Steam Deck focused YouTube channel which often posts optimised setting guides, plugin guides and news. This creator also provides a Steam Deck Gaming Companion app, which at a glance can tell you if a game is compatible with the Steam Deck. -
Deck Wizard
Similar to Steam Deck Gaming, but with more of a focus on gaming, mods and plugins.
15Additional plugins
(Decky Loader)
| Plugin | What it does |
|---|---|
| Animation Changer | Allows you to set custom boot up and shut down splash screens. (I left mine as default but the option is there.) |
| Proton DB Badges | Puts a Proton badge on each game's launch menu so that you can check compatibility easily. |
| SteamGridDB | Allows you to apply custom cover art to your games. |
| CSS Loader | Allows you to apply custom themes to the Steam Deck's "Game Mode". |
CSS Loader — recommended themes
- Capy Menu
- Coloured Toggles
- Faster Transition Animations
- Grey Uninstalled
- Hide White Border
- More Library Icons
- No Focused Library Item Scale
- No Home Filter
- Obsidian
- Round
- Rounded Keyboard
- Rounded Search
- Switch Like Home
- Taller Gameview Hero.
16Special mentions
To my younger sister Biff, who was the first to follow this guide… You taught me a valuable lesson — I can write, format and tweak a guide as much as I want… but I can't account for anyone's ability to read.
Comments
Signed-in readers only. Be decent.
Sign in to join the discussion.
No comments yet.